When the photo lacks the sharpness
or 'How to sharpen photo'
by exem, 14 May 2014, 15:07 CEST
Sometimes the picture lacks one thing to perfection - the sharpness. If the photo is not too blurred you can retrieve it by additional sharpening on the photo editor. A very blurred photo is better to delete, and thus save valuable space on your hard disk or you can emphasize the unsharpness and convert the photo to art work ( ...and say that's exactly as did you want :-) )
There are several ways to sharpen the photo and everyone has their favorite one.
I want to share my favorite technique. This technique isn't my know-how, I found it on tomatito's webpage a long time ago (website is not longer available, archives can be found here).
tomatito is excellent Slovak photographer and his macro photos are amazing. He uses this technique for sharpening of portrait photos but it can be successfully applied on aviation photography.
This procedure is for Adobe Photoshop CS5
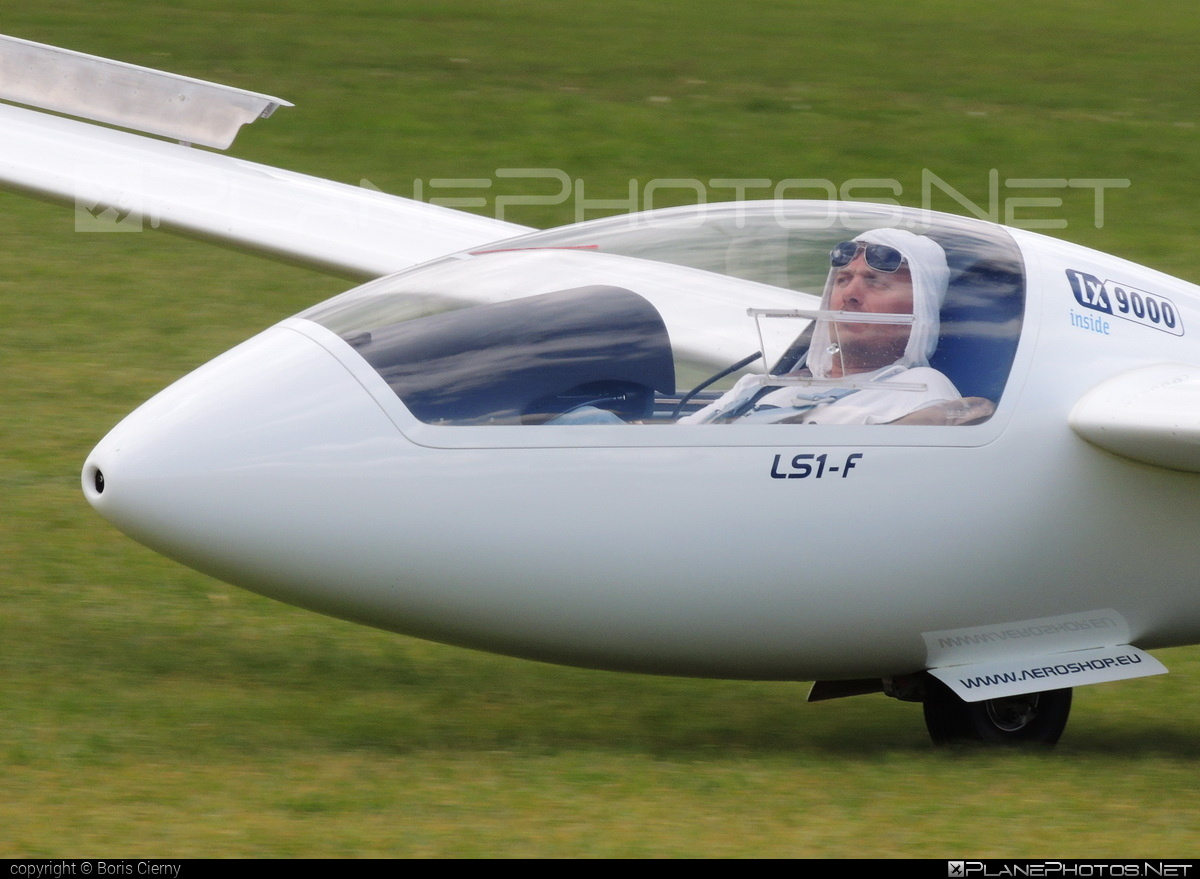
I thank Boris Cierny for permission to use of his picture as sample photo
- Open the photo on phototo editor (Ctrl+0)
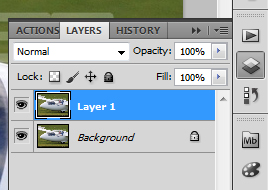
- Copy the 'Background' layer to the new layer (Ctrl+J) and select this layer (named 'Layer 1') in 'LAYERS' window
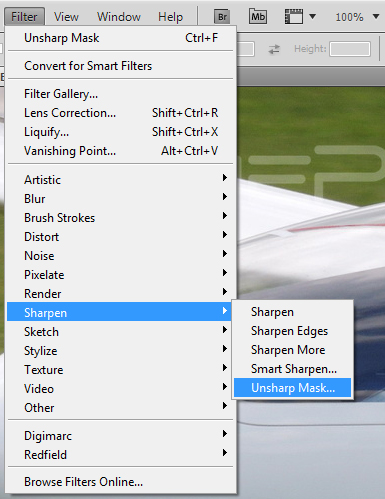
- Select 'Filter'->'Sharpen'->'Unsharp Mask...' from the top menu
 ... and set the following parameters of the filter in the window that opens:
- Amount: 300%
- Radius: 0.2 pixels
- Treshold: 0 levels.
Click the 'OK' button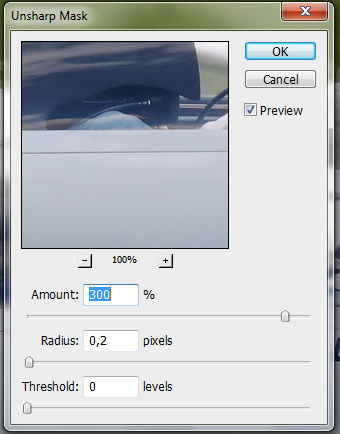
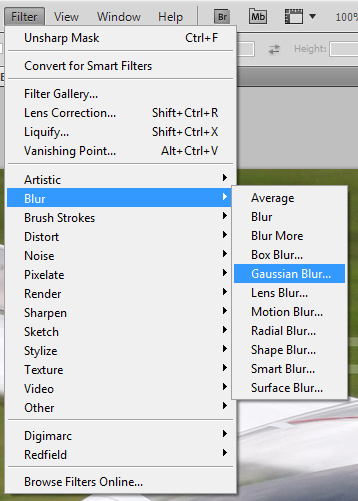
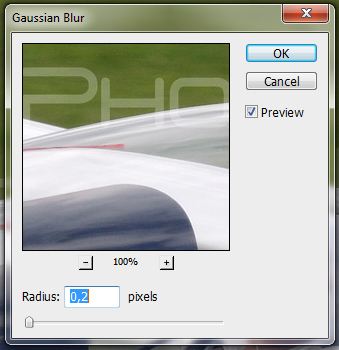
- Select 'Filter'->'Blur'->'Gaussian Blur...' from the top menu
 ... and set the 'Radius' to 0.2 pixels. Press 'OK'.
- Select 'Filter'->'Sharpen'->'Unsharp Mask...' from the top menu again. Leave the same settings as last time and press 'OK' button.
In case, the photo is oversharpened after this step (the contours are jagged), undo this step (Ctrl+Z) and execute it again but with the 'Amount' set to 170% - Where necessary, you can change 'Opacity' of the layer 'Layer 1' for subtilization of the sharpening

-
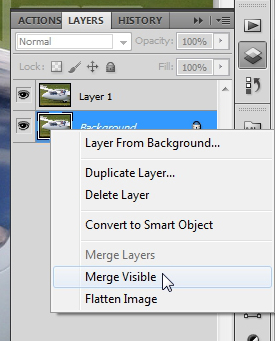
The last step is to merge the layers into one layer. Click with right mouse button to any layer on 'LAYERS' window and select 'Merge Visible'.
 That's all, save the photo. Here is final photo.
Final comparison: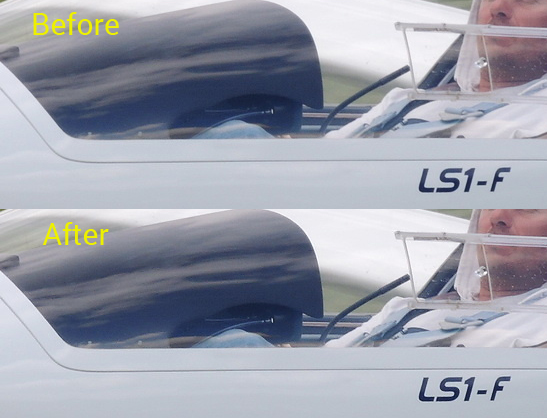